Daily Management System

his allowed everyone to track their performance and make improvements where necessary. We also provided regular feedback to our hourly team members and operators on their performance and how they were contributing to the overall success of the business.

Using Visual Tools to Manage Your Team, Department, or Organization

I am excited as we have rolled out our new Daily Management System and Portland Bottling Company., As a manager in the beverage industry, it’s essential to have a clear and concise visual management system in place. This system should be updated regularly with Key Performance Indicators (KPIs) to ensure that everyone on the team is on the same page. The purpose of a visual management board is to provide everyone with a comprehensive overview of the business’s performance and to promote transparency and accountability, and teamwork.

In this blog post, we will be discussing how we updated our visual management board with KPIs, and how we got our hourly team members and operators involved in the process.

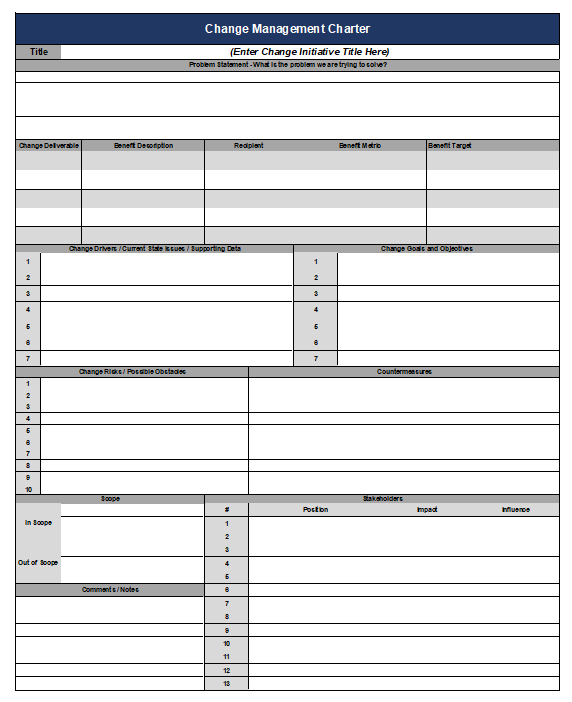
Step 1: Identifying the Key Performance Indicators

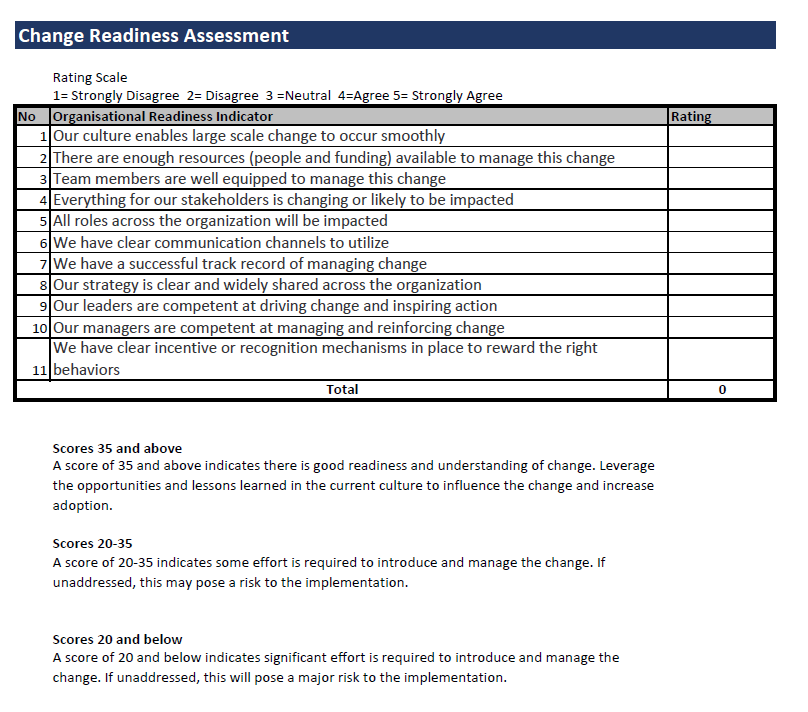
The first step in updating our visual management board was to identify the KPIs that would be the most impactful for our team. We considered a range of factors, including production efficiency, product quality, and customer satisfaction, to determine which KPIs would be the most relevant. All team members got to weigh in on the discussion. The critical point is that if your hourly team members are going to “own” the board, they have to be involved in the creation process.

Step 2: Setting Up the Visual Management Board

We chose to go with a basic board but with a twist or two on it.

  1. Since we truly believe that our People are our greatest asset – that KPI comes first.
  2. Secondly, we chose Safety as that easily coincides with taking care of our team members and ensuring compliance with training requirements.

Step 3: Involving the Hourly Team Members and Operators

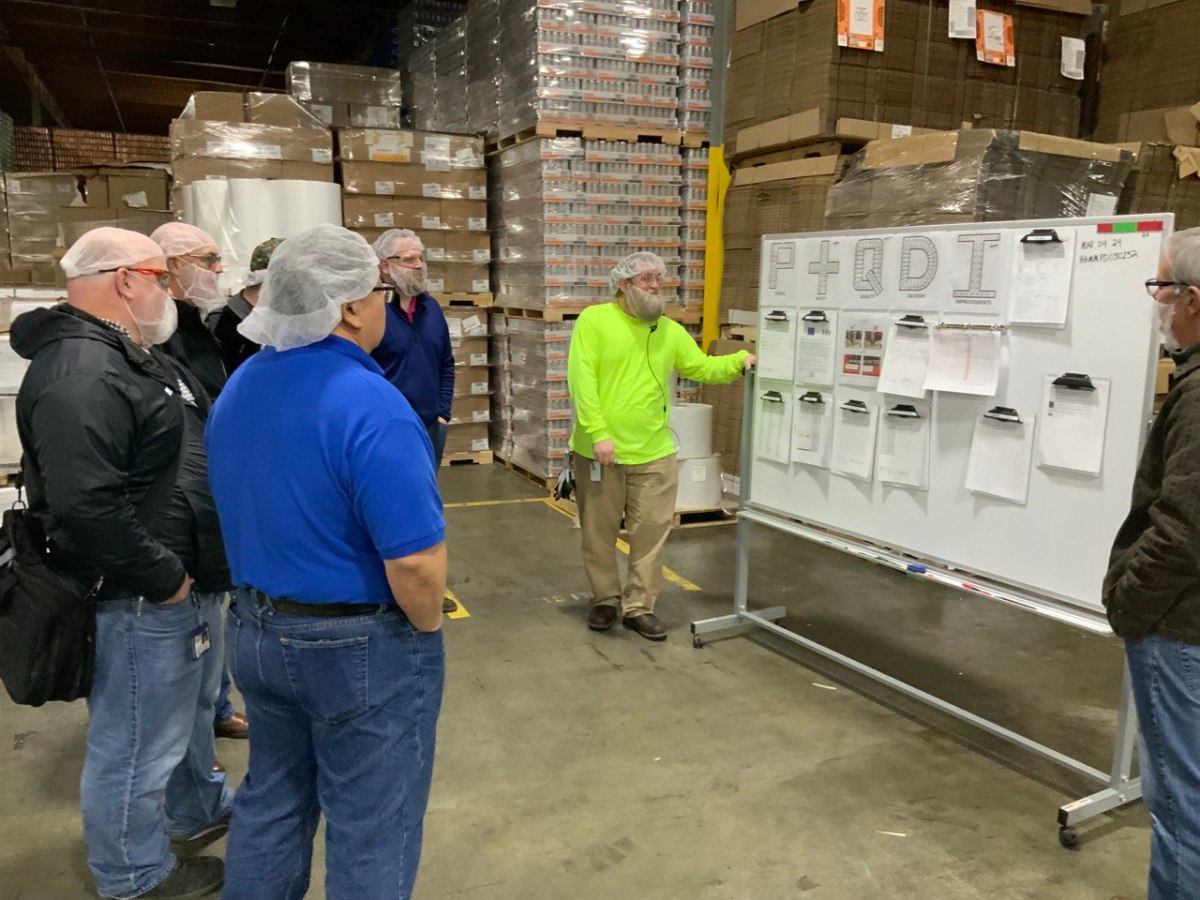
Once we had identified some of the KPIs, we set up a visual management board in our production office area. We held multiple training sessions with multiple departments and even enjoyed “mock” meetings where we got to do a meeting and offer feedback and support to each other. It actually turned out to be quite fun.

The next step was to get our hourly team members and operators involved in the process. We organized a team meeting and invited everyone to discuss the new visual management board. During the meeting, we explained the purpose of the board and how the KPIs would be used to improve production efficiency and customer satisfaction. We also invited everyone to suggest additional KPIs that they believed would be beneficial.

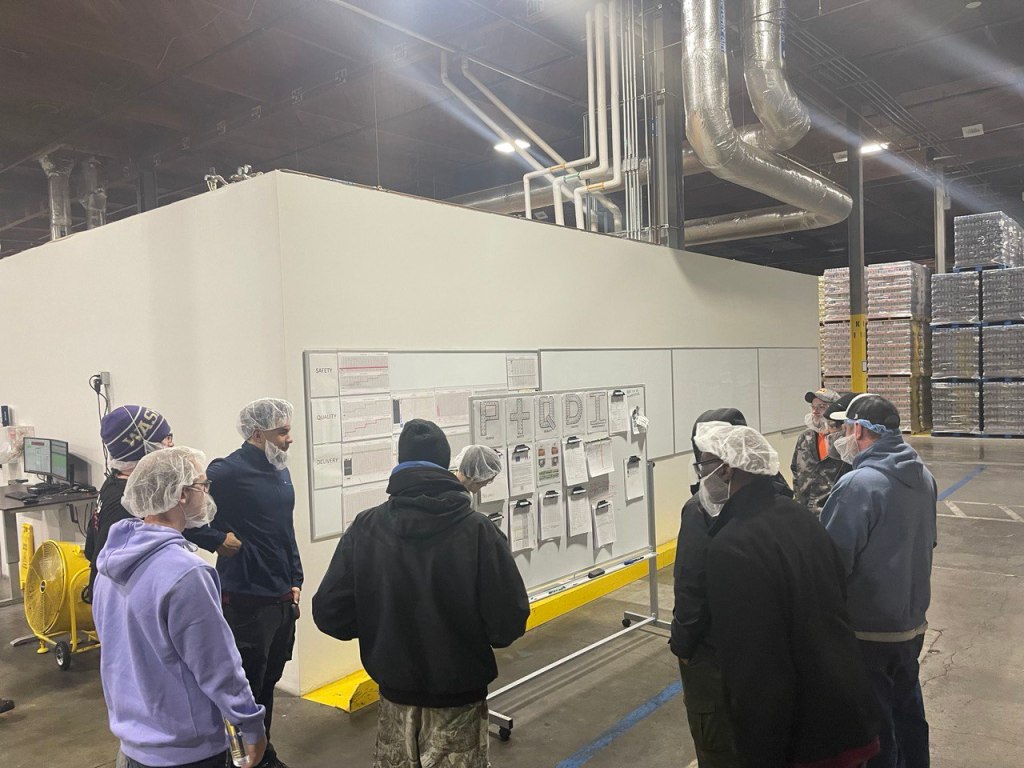
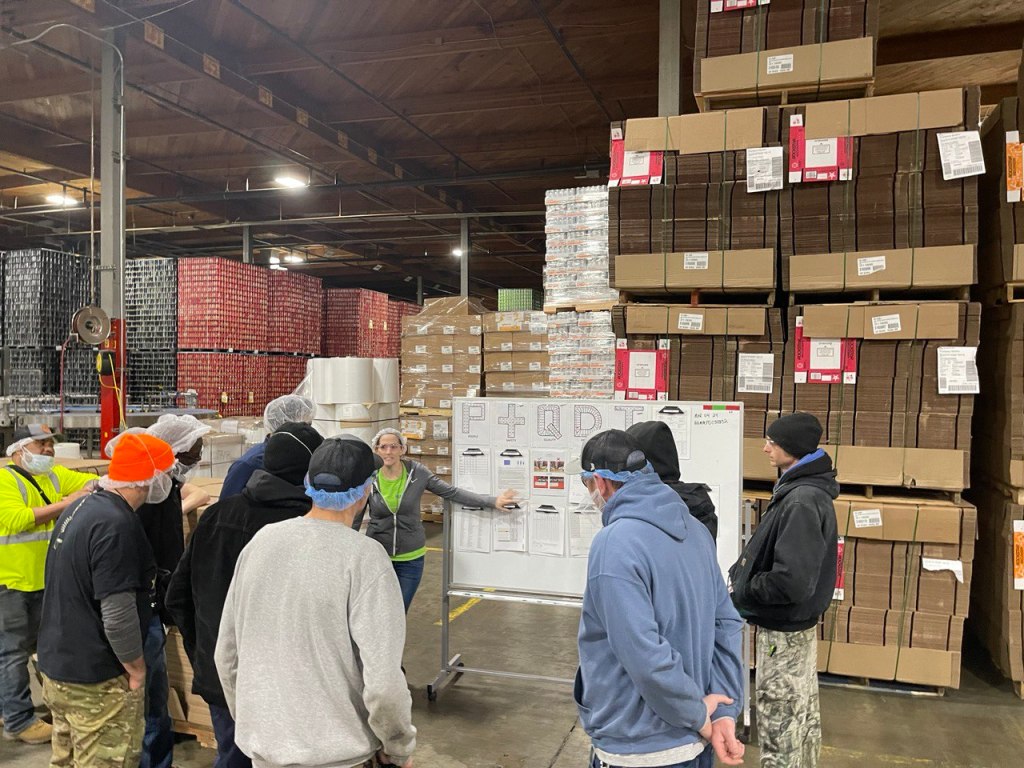
As we implemented the system live, the boards were placed as close to the machines as possible, where they could be easily seen by everyone on the team. We used color-coded charts and graphs to display the KPIs, which made it easy for everyone to understand the data.

Step 4: Updating the Visual Management Board Regularly

We updated the visual management board regularly, ensuring that the KPIs were accurate and up-to-date. This allowed everyone to track their performance and make improvements where necessary. We also provided regular feedback to our hourly team members and operators on their performance and how they were contributing to the overall success of the business.

Step 5: Celebrating Success

Finally, we celebrated success by recognizing the achievements of our hourly team members and operators. This helped to promote a positive and motivated work environment, and it encouraged everyone to continue working towards our shared goals.

Step 6: Management Gemba Walks

Don’t forget about your Management Gemba Walks.

The purpose of management Gemba walks in a visual management system is to enable managers to observe and evaluate how work is being performed in the workplace. Gemba is a Japanese term that means “the real place” or “the place where work is done.” Gemba walks are a management technique that involves going to the actual location where work is being performed, observing the process, and talking to the employees who are performing the work.

In the context of a visual management system, Gemba walks allow managers to see how the system is functioning in practice, identify any issues or problems, and make necessary improvements. Visual management systems are designed to make information about processes, performance, and quality visible and easily understandable, so Gemba walks can be used to ensure that the information being presented is accurate and up-to-date.

Our managers do their formal Gemba twice a week to observe as close to the machine as possible. By actively engaging with employees and observing the process in action, managers can gain a deeper understanding of how work is being done, identify any inefficiencies or areas for improvement, and provide feedback to the team. Gemba walks also provide an opportunity for managers to build relationships with employees, demonstrate their support for the team, and reinforce the importance of continuous improvement

In conclusion, updating our visual management board with KPIs has been a valuable process. It has helped us to promote collaboration, teamwork, and a shared understanding of our goals. By involving our hourly team members and operators in the process, we have been able to improve production efficiency, product quality, and customer satisfaction.

4 Rules of Process: Rule #3

If a process isn’t easy to follow because of various obstacles (problems with equipment, materials, schedules, instructions, etc.) workers will be forced to work “around the system” to get the job done; this will produce differing results.

It must be easy to execute on the job

About four weeks prior to this post we had a technical service person from the equipment manufacturer onsite working with us on some process and programming improvements we requested to be completed. It was towards the end of the week and he would be leaving after the next day.

He was able to witness one of our processes where we filled some generic cans with just water. That water is tested by our lab for sanitation specifications. It was a simple process – if you knew how to do it. What was required was to follow a specific sequence of manually opening valves using an HMI (Human Machine Interface) screen. Filling the cans. Then reversing the process so any excess water could be drained.

One problem…if you were unfamiliar with the screen pictured above – an “easy” 3 step process can be challenging to execute. Imagine how you’d feel looking at all the icons on the screen and not knowing which ones to press or what risk there is to selecting the wrong ones. Daunting right?

Breaking Rule #3

If a process isn’t easy to follow because of various obstacles (problems with equipment, materials, schedules, instructions, etc.) workers will be forced to work “around the system” to get the job done; this will produce differing results.

Making a process easy to execute on the job is important for a number of reasons. Here are a few:

  • It reduces the risk of errors: When a process is easy to follow, it’s less likely that mistakes will be made. This can help to improve the quality of the work and reduce the need for rework or corrections.
  • It saves time: When a process is easy to follow, it can be completed more efficiently. This can help to reduce the time required to complete the work, which can be especially important in fast-paced or time-sensitive situations.
  • It improves morale: When a process is easy to follow, it can be less frustrating for those carrying out the work. This can help to improve morale and increase job satisfaction, which can have a positive impact on team performance.

There are a few things that can be done to make a process easy to execute on the job. One is to break down complex tasks into smaller, more manageable steps. This can make it easier for those carrying out the work to understand what needs to be done and how to do it. Another is to provide the necessary resources and tools to make the work easier. This could include things like clear instructions, templates, or specialized equipment. Finally, it’s important to ensure that those carrying out the work have received proper training and understand the process fully. This can help to reduce confusion and improve efficiency.

Can Your Team Handle the Change?

Can Your Team Handle the Change?
The next step in managing change is to assess how ready your team or organization is able to deal with the changes you are proposing.

The Change Readiness Assessment

The next step in managing change is to assess how ready your team or organization is able to deal with the changes you are proposing. Don’t skip this step. Many change efforts fail not because they were not good projects or even critical to business sustainability but simply because the culture was not ready for the change. Subsequently, the tools available to manage change were not used and the culture became overwhelmed.

It is a simple yet crucial process. Just score the following questions using a 1-5 linear scale

1= Strongly Disagree 2= Disagree 3 =Neutral 4=Agree 5= Strongly Agree

1Our culture enables large scale change to occur smoothly 
2There are enough resources (people and funding) available to manage this change 
3Team members are well equipped to manage this change  
4Everything for our stakeholders is changing or likely to be impacted  
5All roles across the organization will be impacted 
6We have clear communication channels to utilize
7We have a successful track record of managing change 
8Our strategy is clear and widely shared across the organization 
9Our leaders are competent at driving change and inspiring action 
10Our managers are competent at managing and reinforcing change 
11We have clear incentive or recognition mechanisms in place to reward the right behaviors 


The total score at the bottom of the assessment is the “readiness” or your team to embrace the changes you are proposing.

Scores 35 and above
A score of 35 and above indicates there is good readiness and understanding of change. Your change toolkit will require fewer inputs to manage the initiative. Look back at successful implementations and the lessons learned to increase the adoption rate of the change.
Scores 20-35
A score of 20-35 indicates some effort will be required to introduce and manage the change. There are risks that need to be addressed and mitigated to make the implementation successful.
Scores 20 and below
A score of 20 and below indicates significant effort will be required to introduce and manage the change. A large focus on the change management implementation plan will be around risk and risk management.

Summary

Are you planning to kick off a change proposal to your leadership team? Or are you in the planning phase of a significant implementation? Take a moment and run through this readiness assessment with your charter team and get a good view of the work necessary to manage the change based on your team’s ability to assimilate the changes.

As always, I’d love to hear back about your experience with both challenging and successful change initiatives. Feel free to drop me an email or comment below.

The Change Management Charter

suggests, the starting point of any effective change effort is a clearly defined business problem. By helping people develop a shared diagnosis of what is wrong in an organization and what can and must be improved, a general manager mobilizes the initial commitment that is necessary to begin the change process

…the starting point of any effective change effort is a clearly defined business problem. By helping people develop a shared diagnosis of what is wrong in an organization and what can and must be improved, a general manager mobilizes the initial commitment that is necessary to begin the change process.

Harvard Business Review. HBR’s 10 Must Reads on Change Management (including featured article ‘Leading Change,‘ by John P. Kotter) . Perseus Books Group. Kindle Edition.

The Change Management Charter

The most important and most overlooked part of planning any change initiative is the charter. Get at least this section of the change methodology correct and you are most of the way to a successful and less painful change project. A well-designed change management methodology will consist of at least these seven items – the last one, an after-action review, is not on the charter but is part of the collection of tools:

  • Problem Statement
  • Deliverables
  • Change Drivers
  • Change Risks / Countermeasures
  • Scope Parameters
  • Stakeholders


Get the charter right and the rest of the plan will come together. This is because the charter, when completed, is a reflection and evidence of a deep dive to grasp the current condition, understand the risks both operationally and culturally, and consideration of the human element in change management.

The Problem Statement

This is the hardest part of any change – to define the problem and communicate it in a way that will ensure buy-in and alignment from upper management, peers, and team members. In fact, most change initiatives fail at this step. This is where most of the work should take place. The information gathered and entered into the charter will feed into the rest of the key tools of your change management methodology.

Take the time, put in the work, and use data – good data. One thing that helps is to use specifics. Similar to describing a target with S.M.A.R.T. goal discipline, use the 5W’s and 1 H to write out the problem – Who, What, Why, Where, When, and How. A well researched and data-supported problem statement will get your audience into solution-finding before they are even aware that they have gone there.

Deliverables

So let us assume that your problem statement is solid. There is agreement on the problem and everyone wants to move forward. The question now is what or how will your idea fix the problem?

Here is where you want to define four elements that will be delivered through the change initiative

  • Benefit Description – what will the benefit be – how is it linked to the problem?
  • Recipient – who will be impacted by the benefit?
  • Metric – how will the benefit be measured to validate the proposals?
  • Target – after we agree on a way to validate the improvements what defines success? What will the target of the benefit be?

Change Drivers / Current State Issues – Change Goals & Objectives

These two sections describe the current state of the process that needs to be changed and the corresponding target state or “objective.” Using the word “driver” denotes the specific actions taking place that are causing the unwanted condition to exist. It is important that a goal or objective is directly linked to a driver or a specific issue. This will ensure that all the necessary issues have been discovered and a plan exists to correct or improve them.

Change Risks / Countermeasures

All change carries risks, operationally and culturally. This is where you make sure that proper risk analysis has been completed with countermeasures to address each one. This step, after the problem statement, is the most often missed and the one where the consequence is the greatest. Every risk with associated stakeholders needs to be addressed. Along with that is the risk of doing nothing.

There are plenty of sources available for performing risk analysis. Whichever is chosen, make sure you dive deep and select countermeasures to mitigate the risk to acceptable levels.

Scope Parameters

This often missed step is the silent killer. It seems unnecessary until the work sessions begin to take place. As you recruit your multi-disciplinary teams to work on the solutions the participants usually begin adding solutions to address all the problems. You will hear statements like “well, the question then becomes….” or “if we going to (insert solution here), we might as well do this (insert another idea) while we are here.”

If you are looking to extend the completion date of your initiative, this is the way to do it. Allow add-ons to the list and you will never get done.

Define the parameters to your change initiative and stick to them. You will often refer to them as your team works its way through the change process. Define what is in-scope and what is out-of-scope.

Stakeholders

Have you ever arrived at your roll-out date, training event, or kick-off only to hear feedback from people that they are unaware of the change and don’t understand why it is happening? That is a good indication that a proper stakeholder analysis was not completed (as well as a communication plan but that will be covered in a later post).

In this crucial step, you will list the people affected by the proposed change. Similar to a RACI chart, this will help to develop a communication plan to eliminate or at least reduce the shock or impact the change will have on the people in your organization.

If you haven’t yet downloaded a PDF of a template you can do so here. In it, you will see that when you are listing the stakeholders, you will also try to estimate the impact and influence they will have on the success of the change. Those with high influence will need to be approached differently than those with low influence. They will need to be on board. This is the group mentioned by John Kotter as the “guiding coalition.” Those who measure high on the impact scale will need more attention to the “why” behind the change and the “how” of the level of disruption it may cause.

Summary

Have you been tasked with making an organizational or team change? Let this charter be your first step to successful change implementation.

I’d love to hear back about your experience with both challenging and successful change initiatives. Feel free to drop me an email or comment below.